Python Deployment
Examples of Python Deployment Workflows
Documentation with Sphinx and Read the Docs
Setting up Sphinx
In order to generate a documentation from the docstrings we are going to use Sphinx.
- Create a docs directory in your projects main directory.
mkdir docs
cd docs
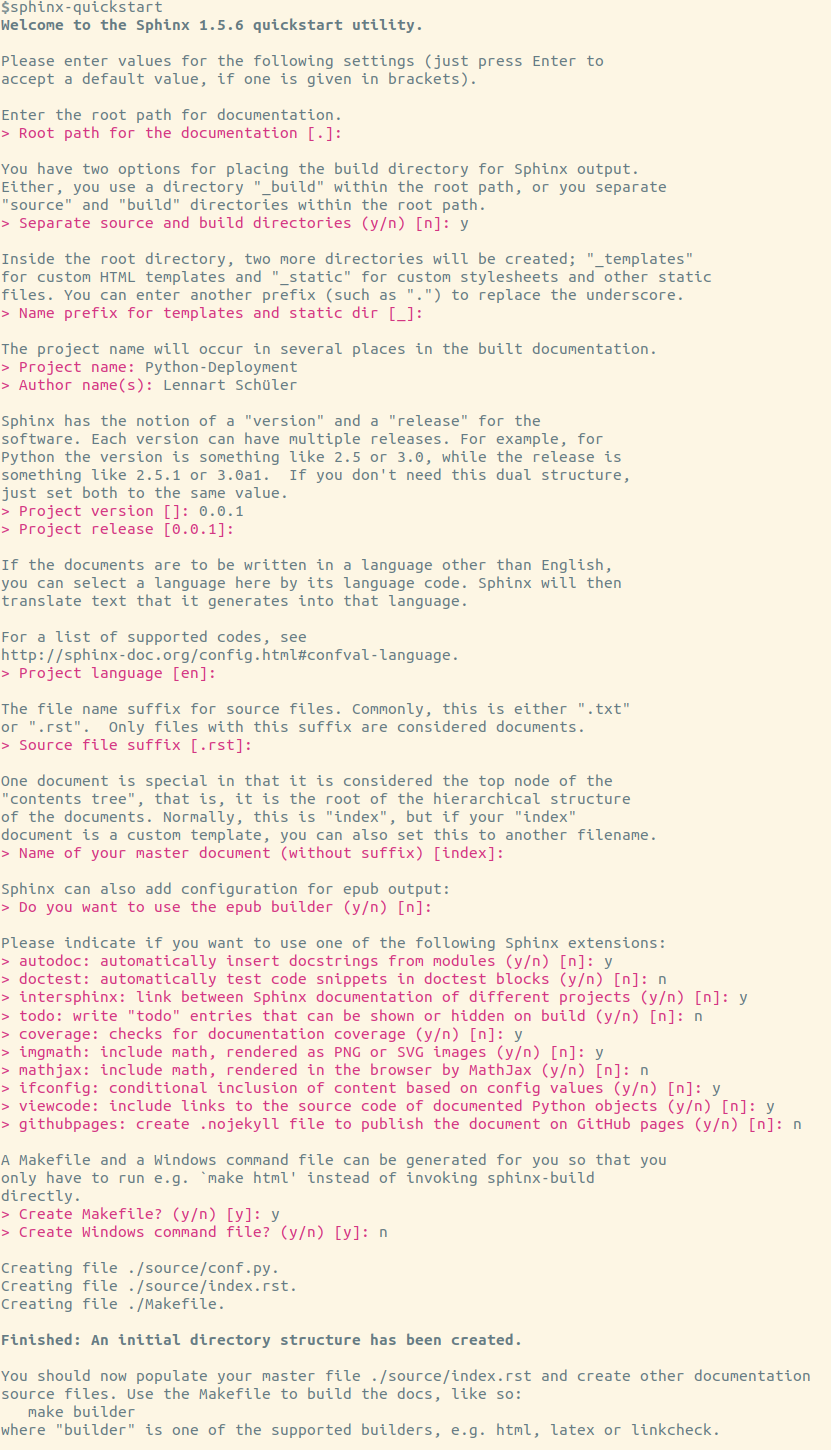
- Use the quickstart script provided by Sphinx.
sphinx-quickstart
And use the following settings.
3. Change source/conf.py. The first thing to do is to uncomment and change
following lines at the top of the file.
import os
import sys
sys.path.insert(0, os.path.abspath('../../'))
A few extra extensions should also be added. The autosummary extension
generates function/method/attribute summary lists from the docstrings,
napoleon enables Sphinx to parse Numpy and Google style docstrings.
Finally, the numpydoc extension loads several extensions for better
support of Numpy.
extensions = ['sphinx.ext.autodoc',
    'sphinx.ext.intersphinx',
    'sphinx.ext.coverage',
    'sphinx.ext.imgmath',
    'sphinx.ext.ifconfig',
    'sphinx.ext.viewcode',
    'sphinx.ext.autosummary',
    'sphinx.ext.napoleon',
    'numpydoc']
And some more changes:
- master_doc = 'contents' for a better overview page,
which we will later add.
- html_style = 'sphinx_rtd_theme' for a nicer theme.
- For compatibility with Read the Docs:
html_theme_options = {
    #    'canonical_url': '',
    #    'analytics_id': '',
    'logo_only': False,
    'display_version': True,
    'prev_next_buttons_location': "top",
    #    'style_external_links': False,
    #    'vcs_pageview_mode': '',
    # Toc options
    'collapse_navigation': False,
    'sticky_navigation': True,
    'navigation_depth': 4,
    'includehidden': True,
    'titles_only': False,
}
- Comment out
# html_static_path = ['_static'] - In case you use pictures hosted somewhere, add
suppress_warnings = [
    "image.nonlocal_uri",
    #    'app.add_directive',  # this evtl. suppresses the numpydoc induced warning
]
- And finally add some intersphinx mappings for links:
intersphinx_mapping = {
    "Python 3.7": ("https://docs.python.org/3.6", None),
    "Python": ("https://docs.python.org/", None),
    "NumPy": ("http://docs.scipy.org/doc/numpy/", None),
    "SciPy": ("http://docs.scipy.org/doc/scipy/reference", None),
    "matplotlib": ("http://matplotlib.org", None),
}
Now you are ready to create your docs. Have a look at the docs/source/
folder for an example and how to use autosummary in the source files.
Publishing on Read the Docs
- In the
docs/folder create a filerequirements.txtwith a content like
numpy>=1.14.5
numpydoc
- Log in or sign up on Read the Docs
- Click on
Import a Projectand select your repository on GitHub and activate advanced options. - Select Python as the programming language.
- Add
docs/requirements.txtpath to theRequirements filefield. - Tick
Use system packages.
Now, your documentation should be ready and hosted on Read the Docs. With every push to your repo, the documentation will automatically be built by Read the Docs.
In case you want to add a readthedocs badge, have a look at the first line after the heading of the README.md of this project.